
Robots.txt: What You Need to Know
Robots.txt is a simple but powerful file that webmasters use to present a website to Google. However, even a small error in your Robots.txt file can wreak havoc with how your website is being crawled and indexed. In this article, we’ll discuss what is a Robots.txt file, why it’s so important, and how you can create and optimize a Robots.txt file for your website.
What is a Robots.txt File?
Robots.txt file, also called robots exclusion protocol (REP) is a text file that webmasters use to tell robots which pages on their site can be crawled and which can’t be.
The first thing a crawler does when it visits a site is to check its Robots.txt for instructions on how to crawl it.
Robots.txt files have different types of inclusion & exclusion protocols. The most common command on a Robots.txt file looks like this:

The asterisk after user-agent signifies that this instruction is for all web robots that will visit the site. The forward slash after disallow represents that none of the pages on the website can be visited. Here’s an example of Google.Com’s robots.txt file
Why is a Robots.txt File Important?
Now, you may look at the directives above and wonder, “Why aren’t we allowing a crawler to visit our website? Doesn’t everybody want their website to be crawled and indexed?”
Well, to use the favorite words of SEOs, it depends.
In most cases, you don’t want Googlebots to crawl and index certain pages of your website. That’s why a Robots.txt file and its Disallow and Noindex directives are so important.
One reason could be that your website may have lots of pages. And a crawler’s job is to crawl every single one of them. Having lots of pages makes it longer for the crawler to go through your entire website. This trickles down negatively on your ranking because there is a crawl budget that a crawler needs to adhere to. And there are two key considerations to it: crawl limit and crawl demand.
According to Google, the crawl limit is “the number of simultaneous parallel connections GoogleBot may use to crawl the site, as well as the time it has to wait between the fetches.” The crawl limit can change based on crawl health, which is how quickly a site responds to the crawler and the limit set in the search console.
Crawl demand, on the other hand, refers to the demand from indexing. This means popular URLs will be crawled more often to maintain freshness in the index.
To this end, we can define crawl budget as the number of URLs a crawler can and wants to crawl. With an optimized Robots.txt file, you tell the crawler which pages are most important for your website and can, therefore, be included in the crawl budget. That’s why Robots.txt files are super important.
Where to Find the Robots.txt File?
Here’s how you can check if you have a Robots.txt file for your website (and you can do this exercise to check for any website, for that matter). Open up your browser, and in the address bar, type in your website’s domain and add “/robots.txt” at the end. So for example “domain.com” will look like “domain.com/robots.txt”.
If you see something like this, that means you have a Robots.txt file:

If it returns with nothing to show for, that means your file is empty, and if the results show a 404 error, you’d want to have that looked into and get it fixed right away.
With this exercise, you’d know if your website has a Robots.txt file or not. You will have to create one from scratch if it doesn’t exist. For that, make sure you’re using a plain text editor like Notepad for Windows or TextEdit for Mac.
To look for your Robots.txt file, you need to go to your website’s root directory. The root directory can be found in your hosting website’s account, and then go to the file management or FTP section. You will find something like this:

Look for the Robots.txt file and open it up to start editing. If there is any text, delete it and keep the file.
For WordPress users, the Robots.txt file may appear at yourwebsite.com/robots.txt, but it may not show in the files. This can be attributed to the fact that WordPress makes virtual Robots.txt files if there are none in your root directory. If this happens to you, you’d need to create one from scratch. You will learn this in our next section.
How to Create a Robots.txt File?
Before you get going with creating the Robots.txt file, try to familiarize yourself with the syntax used in it. Here is a link from Google with all the basic terminologies.
Then open up your plain text editor, and the first thing you’d want to do is set up your user-agent term. Since we want it to apply to all web robots, we’ll use an asterisk like this:
![]()
Then type disallow but don’t write anything after that. We want all of our pages on the website to be visited by the crawler. Here’s how it would look:

To link your XML sitemap, this is what you type:

This is what a basic Robots.txt file looks like. But it’s time to give it a spin in terms of optimizing it.
As mentioned earlier, the more smartly your crawl budget is used, the better it is for your SEO. So, for example, there is no use in including a page in the crawl budget, which is used to log in to the backend of a website. Hence, you can go ahead and remove it from the crawl budget like this:

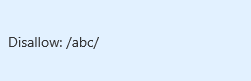
A similar directive can be used to tell the crawler not to crawl specific pages. For example, if you don’t want the page “www.domain.com/abc/” to be included in the crawl budget, you can take part “/ABC,” add a slash at the end and write it after Disallow like this:
You can also use this directive when you have a print-friendly version of a page or when you are doing AB testing and include any one version in the Disallow directive. And since your Thank You pages should only be shown to qualified leads, you can use this directive for them as well.
Whereas the Disallow directive blocks the crawler from visiting the page, it doesn’t necessarily mean that the page won’t be indexed. So, to prevent indexing, you can use the Noindex directive in unison with the Disallow directive.
Testing Everything Out!
Once you’ve created or customized your Robots.txt file, you need to make sure that everything is working smoothly, especially your Robots.txt file. Using the Google Search Console, you can validate your crawl directives. You can also sign in to your webmaster’s account and make use of Google’s free Robots.txt tester tool.
Once in the dashboard, select your website, and in the sidebar on the left, click “crawl.” Then click on the Robots.txt tester in the drop-down and replace any old code with your new one. Hit the “Test” button and if it turns to “Allowed”, congratulations, your Robots.txt is all good to go.

Online Robots.txt Tester Tools
There’s an array of Robots.txt tester tools out there that help you validate that your Robots.txt file is working properly. If you don’t want to manually go through the script for robots.txt, you should consider using robots.txt file checkers. These give you an advantage to smartly analyze large-scale websites and identify if there are any URLs that are blocked, as that would significantly impact your SERP rankings. Let’s have a look at some of these tester tools:
- Google’s Robots.txt Tester: This is Google’s own tool that helps show whether your Robots.txt file blocks specific URLs from being crawled. This a browser-based tool that can help you quickly check your robots.txt, but does have its limitations. For instance, this tool will only check domains with the URL-Prefix properties. Also, you’ll need to copy and paste the content from the editor into your robots.txt file that’s stored in your server.
- Merkle’s Technical SEO Robots.txt Validator: This is another browser-based Robots.txt file checker on whether a URL is blocked or statements are blocked. Furthermore, you can also check whether resources on the page such as CSS, JavaScript, and images are disallowed or not.
- Screaming Frog: Their Robots.txt tester tool is a downloadable program which can crawl single and multiple URLs. You’ll be able to filter URLs that are blocked using filters – making it easy for you to analyze your URLs quickly. Furthermore, you can also export the bulk URL reports to share with other users.
- Ryte Test Tool: Ryte is a website solution that helps website developers focus on a high-quality user experience. The solution also provides a browser-based tool that helps analyze robots.txt files for URLs that might be blocked by search engines. It has an online editor that lets you copy-paste the contents of the robots.txt file for real-time analysis.
Final Takeaway
While optimizing your Robots.txt is often overlooked in the SEO process, a little effort on that front can’t do any harm. So go ahead and implement what you learned from this blog on your website. We hope you will be pleasantly surprised with the results.